| Gallery | The Mall | Member Directory | MHA News | Library | Links |
with
Norbert Senf and Pat Manley
Photo report by Norbert Senf

New MHA member Forno Bravo has published a great, free 60 page book on building an authentic
southern Italian pizza oven. MHA member Scott Goodman has built one.
This was the plan for the Wildacres oven workshop this year, until I saw this geodesic one on the
Forno Bravo Forum, a great new resource for information exchange in the oven community.
I asked Pat Manley if he would co-lead the workshop, and he readily agreed.

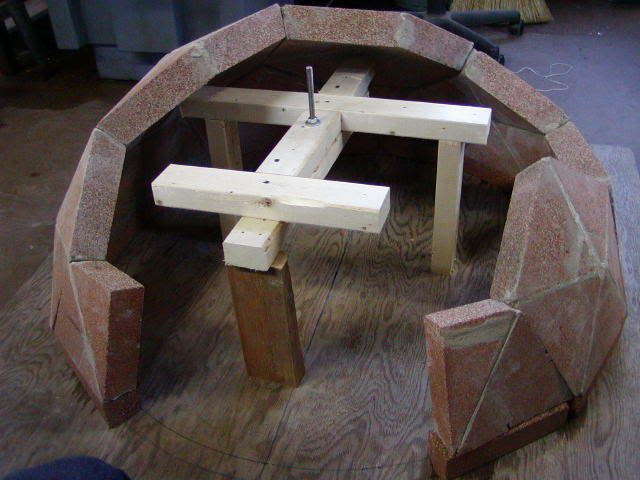
dmun is a clockmaker in New Jersey who built this geodesic oven from firebrick.
It was pretty labor intensive, and my idea was to build it from raw (unfired) firebricks The closest we were able
to get was to order a custom, high grog, clay body from Highwater Clays in Asheville. Thanks to Tom Trout
for doing the research, making the arrangements, and picking up the clay.

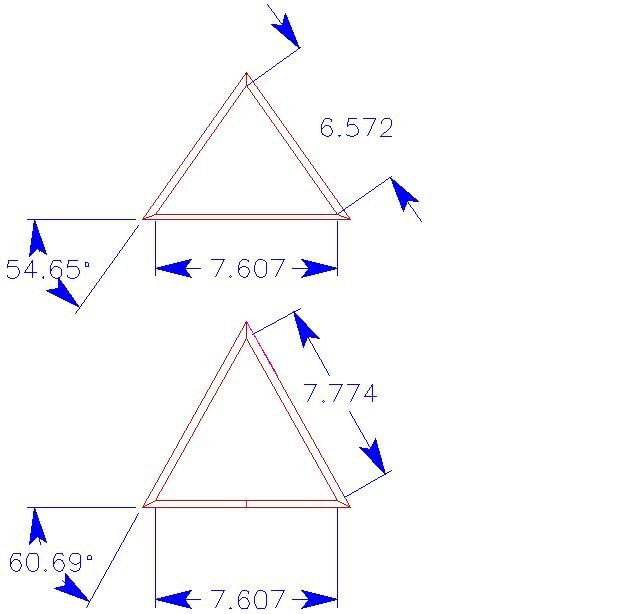
Here is dmun's drawing of the two triangles required. The taper angle he specifies is 6.5 degrees
Susan Alexander shows Pat Manley how to transform the bags of prepared clay (in plastic bags and cardboard boxes on the rear table) into slabs.
Susan and her friend Kathleen Randolf are potters, and were invaluable in showing us some of the standard techniques that are used with clay.
We wanted slabs 2.25" in thickness, same as a firebrick. After some experimentation, we settled on
the method shown here, which worked well. In the foreground is one of the two plywood tile templates.
I had made a plywood template and cutting guide for each of the two tile sizes, a pentagon and a hexagon. I'm holding the wire cutting
jig that I also built at home prior to leaving for Wildacres.
First test tile. We needed to know right away if this idea would work enough to proceed with the workshop. Plan B was to build
a southern Italian style oven like in the Forno Bravo plans, except from raw firebricks, which would be much easier to shape.
Detail of cutting jig. The bolt at the top right is similar to a guitar tuning peg, allowing the wire to be tightened.
Pat Manley tries it out. Pat made most of the tiles, with the help of lots of volunteer labor to help
prepare the clay into slabs.
My neighbor Dave from Canada was in Asheville on business, so stopped by.
Oops.
We needed to dry out the tiles, and fairly fast, because the pizza party was only two days away. We overamped the first couple
in a kiln, even though it was on the lowest setting. It became quite clear that drying the tiles was going to be the major issue we were
facing. Normally, you would air dry this clay body for about 3 - 4 weeks. We actually did make one test tile from Redart clay and sand
(same as the clay brick mortar at the workshops), aka adobe. In hindsight, this would probably have been a better mix, and
could have been dried in much shorter time than an almost pure clay body such as this.
From a potter's point of view, this was a clay body with a lot of grog (aggregate). From a masons' point of view, this was almost pure clay.
Results of our first drying run. More work for Pat.
Luckily, we had lots of people eager to help.
Colby DeHoff and Steve Paisely make a sample tile from Redart mix.
Colby is VP of Marketing for Whitacre-Greer in Ohio, who make about half of all the low duty firebricks sold in the
U.S. It was great being able to pick his brain about firebricks, firebrick clay, the production process,
and the possibility of obtaining unburned (raw) firebricks before they go into the kiln, something that
had not been considered before.
Doing a test fit to see if we were in the ballpark.
I was more than a little interested. I tried building a 3-D CAD model off the tile
dimensions from the web, and found some issues with the fit. I found some more accurate dimensions, but still could not get an
exact fit in the virtual oven. Being masons, I figured we could fix it with mortar joints, and abandoned the CAD model for the time being.
Very interestingly, Jean-Francois Vachon mentioned that he has a 5-axis stone cutting machine up at Pierres Steatites in Quebec,
about a 5 hour drive from my house
.
It is capable of cutting this shape exactly, plus or minus 1/100 of an inch, from the CAD model. So, once we get the two virtual CAD tiles
exact, we hope to try it out. Soapstone geodesic oven, anyone?
Not too bad. Nothing some mortar joints won't fix. We decided that, due to the fit issues, we would use a sand dome as a form.
Out of the lab, into the real world..
Joints were slushed in after, with a 1:4 Redart:sand mortar.
Trimming the leather-hard shape, with a small curing fire inside. Still hopeful that we could get it dried out in time.
The tile standing up on top is the test tile made from Redart and sand. Susan took it home to do
some testing on it, along with a spare regular tile.
We monitored the inside surface temperature with an infrared gun, and kept it below 200F. Letting the oven sit for a while.
Jim Luckner works on building the door area, while a fire is on.
Uh oh. Spalling on the inside surface. The clay is spalling off in very thin flakes, with a popping sound. Not a good sign. The tiles
are still really wet, even though they look surface dry for the most part.
Because the clay body is so tight, with no pathways for steam to escape, as soon as the water boils beneath the surface and turns to
steam, it explodes and pops off a layer of clay.
We quickly decided that it was too risky to get this oven dried by pizza time. Fortunately, I was able to enlist one of the most
experienced brick pizza oven builders in the world, Pat Manley, as my partner in this workshop. We decided we needed to build a
backup oven, and he did an amazing job in around 4 hours (see Pat's oven later on in this story)
Once we decided that the oven was past the point of no return, we made a decision to do a destructive test on it to learn about
the stability of geodesic ovens, which in theory should be very stable. We called in Marty Pearson and his air blower (see Pat's oven,
below), to do the honors. We scheduled it so that the oven would blow up during the pizza party, as the entertainment highlight.
Beer, pizza and blowing things up - heater mason nirvana.
When the top tile was gone (spalled), we replaced it with a backup green tile.

Marty working the blower. Small chunks of clay are flying through the air, acting as extra pizza toppings.

We blowed it up goood !!
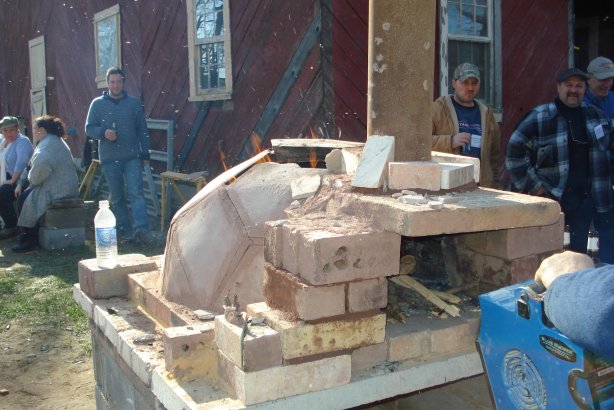
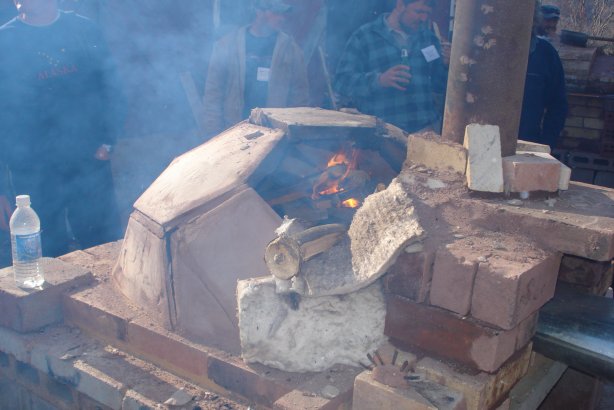
Pat and his crew outdid themselves, building a 32" x 36" vaulted oven in 4 hrs.
See also,
2007 Photo Report
2006 Photo Report
2004 Photo Report
2003 Photo Report
2002 Photo Report
2001 Photo Report
2000 Photo Report
1999 Photo Report
1998 Photo Report
1997 Photo Report
This page was last updated on
May 5, 2008
This page was created on April 20, 2008